
This blog post was translated from this German version using Deepl and QuillBot.
How can I bring my priceless analog images into the digital age?
This question has undoubtedly been posed by all of us who still have analog negatives. We had pictures printed most of the time back then, maybe even a poster, but today, aside from a few photo albums, nothing points back to our early days of analog photography.
Which is a shame, because true treasures can be found among the negatives.
Looking through old negatives today is often like taking a nostalgic trip back to our childhood, complete with all the trimmings of what was important to us back then.
So, if you're considering digitizing your negatives in order to bring the most beautiful images back to the "surface," keep reading...

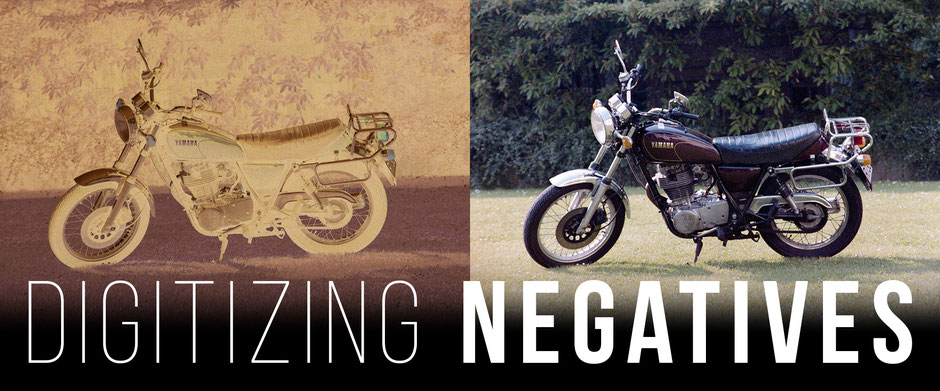
Digitizing negatives - but how?
The question that must be asked in advance is, of course, which method can deliver the best digitization results with a reasonable amount of effort?
Scanning and photography are the two most common standard methods.
Method comparison: scan vs. photo
For this reason, Hermann Groeneveld, who digitizes his negatives by scanning, and I, who prefer photographing, decided to compare the two methods using a negative.
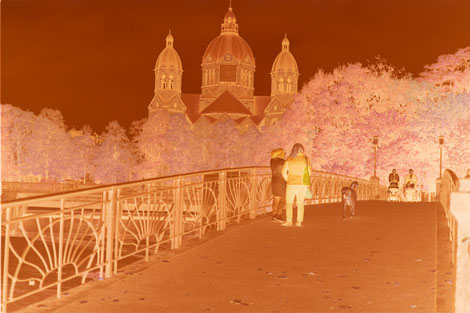
On the left you see the 24x36mm 35mm negative that was used for the comparison.
Below you can see the direct comparison of the results of both methods.
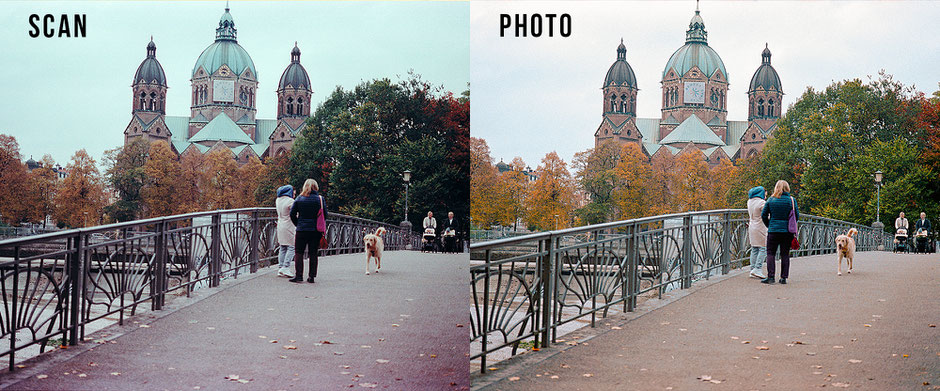

Both digitization processes deliver comparable results.
This means that the image quality of the results is more limited by the quality of the source material (film grain) and less by the respective workflow.
Of course, different tools were used to convert the negative to the positive and the final image processing was also subject to personal taste (contrasts, colors, etc.).
However, the image sharpening, which has a high impact on the final appearance, was done under the same specifications, so both images are very comparable.
Conclusion: just use the digitizing workflow that suits you more.
Digitizing negatives by photographing them
I am aware that many roads lead to Rome and therefore I would like to present my workflow for the photographic digitization of negatives here as an example. A list of the materials used with sources of supply can be found at the end of the article.
For practical purposes, the following procedure has proven successful:
-
Step-1: Created digital contact sheet of a film.
To do this, the individual negative strips of a film are sorted by frame number into a transparent negative sleeve (Din A4) and photographed as a whole.
I have already described the procedure in a previous blog article.
- Step-2: Select the most interesting image motifs for subsequent digitization
- Step-3: Photograph selected negatives with high resolution, convert them into positives, edit them, retouch them and then store them in an orderly manner on a hard disk.
Description of my workflow for digitization by photography
A) The repro-set
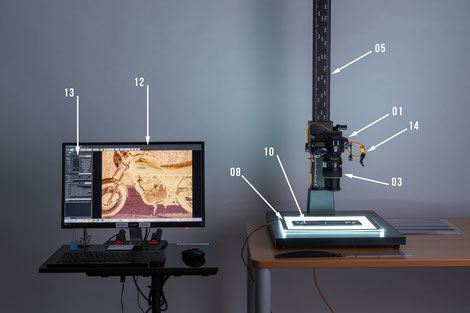
Elements of the used repro-set
01 Nikon D810
03 Tokina Macro lens
05 Kaiser repro tripod
08 Transmitted light unit (still without mask)
10 Negative holder 24x36mm
12 Windows computer with monitor
13 ControlMyNikon v5.6 control software
14 Tethering cable for D810
Details see material list at the end of the article.
B) The mask for the transmitted light unit

Mask for the transmitted light unit 01
To suppress the penetration of stray light into the lens, a mask for the transmitted light unit was made from a plastic plate (09).
A suitable exposure window was cut into the cover for selective illumination of a negative.
A guide rail was also cut to allow the negative holder (10) to be easily moved along a stop.

Mask for transmitted light unit 02
On the left you will find a scaled sketch of the mask including the stop for the negative holder.
The transparency unit only has to be positioned correctly once before the start of the exposure session.
After that, the negative holder can be loaded with new negative strips again and again and simply pushed along the stop.

Mask for the transmitted light unit 03
On the left you can see the completed mask for the transmitted light unit including stop and negative holder.
The mask was attached to the transmitted light unit with Gaffer Tape and can thus be easily exchanged for the mask for 6x6cm negatives.
Note: Unlike most other fabric tapes, Gaffer Tape (19) can be easily removed again with almost no residue.
C) Der Negativhalter

Negative holder 01
The negative holder used here for 24x36mm 35mm film (10) is used to clamp a negative strip as flat as possible.
A high flatness enables a sharp image of the negative right into the corners.
Components of the DigitaLIZA negative holder:
- magnetic snap frame
- metallic base plate
- magnetic stamp, positionable

Negative holder 02
First, lay down the base plate and position the unfolded holding frame on it.
The 6 lateral positioning strips must engage in the recesses of the folding frame.
The business cards shown here only serve to compensate the height so that the hinged frame does not tilt.

Negative holder 03
The next step is to place the negative strip in the snap frame.
The lettering on the negatives should be legible and oriented upward.
It is important to place the strip as centrally as possible.

Negative holder 04
Now take the magnetic stamp and place it on the lower half of the hinged frame so that the 4 pins of the frame engage through the openings of the stamp.
Here, the stamp is quite strongly attracted to the bottom plate by the magnetic forces.
The negative strip is pressed flat by the pressure and fixed in the folding frame.

Negative holder 05
Now the upper half of the folding frame can be swiveled down, with the two halves pressed firmly together by magnetic forces.
This ensures that the negative strip is securely clamped at the outermost edge.

Negative holder 06
Finally, the magnetic stamp is pulled off upwards, releasing the base plate.
The negative holder is now ready for the exposures and can be placed on the mask of the transmitted light unit.
Tip: It is worth using a Rocket blower (20) and/or a fine brush to remove the last dust particles from the negative strip. It is best to use glacé gloves (21) to avoid fingerprints.
D) The camera settings

The camera settings
A Nikon D810 with a Tokina 100mm lens (03) was used to take the 1:1 format images.
The camera was connected to the computer via the USB port using a tethering cable (14):
- White Balance: 5260°K (daylight).
- Shooting Mode: Manual
- All other parameters were set in the ControlMyNikon software
E) The shot
The shot 01
For the macro shots in the format 1:1 the Nikon D810 was controlled with the software ControlMyNikon v5.6:
- Exposure time: 1/2.5 (= 0.4 seconds)
- Aperture: f11
- ISO: 64
- Format: JPG Fine and RAW (*.NEF)
- Resolution: 7360 x 4912 pixels

The shot 02
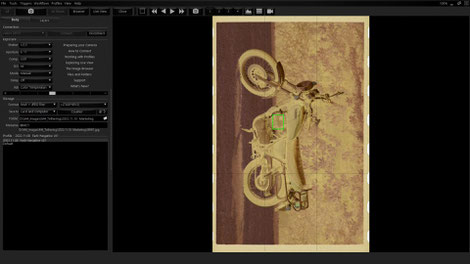
The camera was focused in the live view mode of the software by double-clicking on a relatively high-contrast area of the image.
To check this, the live image was then zoomed in (see arrow). As soon as the film grain was sharply reproduced here, the camera was triggered by mouse click and the image was saved as JPG and NEF in the computer and on the camera's memory card.
F) Image processing with Adobe Lightroom and Negative Lab Pro
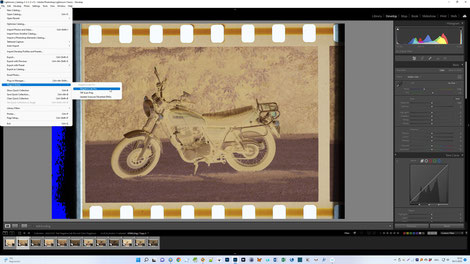
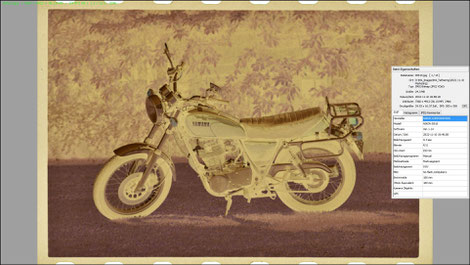
Image processing 01
After importing the RAW files into Lightroom Classic, the negatives were converted into positives using the "Negative Lab Pro" plugin (18).
For this purpose, an image was selected and then the plugin was called for the conversion.
Tip: if all images are selected at the same time and the "AutoSync" mode is set, all images of a set can be converted to positives in parallel.

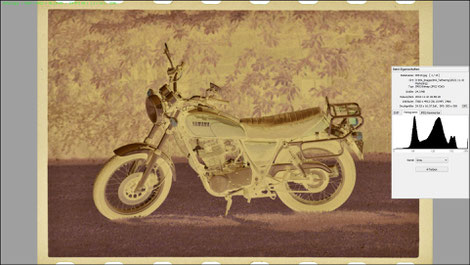
Image processing 02
In the next step, the correct parameters for the conversion (here the default settings) were set and the images were analyzed by the plugin by clicking on [Convert Negatives] and then converted to positives.

Image editing 03
By changing the settings in the [Edit] menu, the later appearance of the recordings can be adapted to personal taste.
The best settings for a film type can be saved as a preset for further conversions.
Tip: Feel free to experiment with the settings until you achieve the optimal results and then save them as a preset.

Image processing 04
After the conversion was completed, the images were cropped in 3:2 format using the Lightroom Crop tool.

Image processing 05
Afterwards the image was processed as usual in the Lightroom Develop Module (color temperature, brightness, contrast, sharpness, etc.).
Attention: The sliders behave unfamiliar!
Tip: Save optimized settings as a preset. This allows you to edit all images identically with just one click for consistently good results on your next film.

Image processing 06
After the image processing was completed, the finished images were stored on the hard disk in an orderly fashion.

Image processing 07
Here you can see an exemplary result achieved with this workflow.
The image shows the author's Yamaha 500 SR from 1985. The negative was stored for 37 years without any additional preservation procedures.
Conclusion
I hope I was able to show you how to bring your negatives into the digital age with manageable effort. A modern 24MPix digital camera is ideally suited for making high-quality digital copies from your negatives.

Currently, analog photography is experiencing a new upswing.
So if you still own an old analog camera, why not put some film in it again?
Re-experience the contemplative slowness of analog photography and the exciting moment when the developed film finally arrives at your home?
How you can then digitize your NEW negatives, you now know...
Whether color or black and white...
I wish you a lot of fun and success in dealing with your old (or new) negatives!
In this regard...
Yours Ralph Oehlmann
List of materials
|
Nr. |
Product |
Link (Germany) |
|
01 |
DSLR, DSLM or system camera (here Nikon D810 DSLR) |
|
|
02 |
Lens: Micro-Nikkor AF 60mm 1:2.8 D (for contact sheets) |
|
|
03 |
Lens: Tokina AT-X Pro Macro 100mm F2.8 D (for single negatives) |
|
|
04 |
Optional AC adapter, replacement for EN-EL15 battery for D810 (40€) |
https://amzn.to/2XcAvQ7 |
|
05 |
Repro stand e.g. Kaiser repro stand RS 2 XA 5411 (230€) - or |
https://amzn.to/3aGaVuA |
|
06 |
Tripod with foldable center column e.g. Manfrotto MT190XPRO03 (188€) |
https://amzn.to/3rUQuQN |
|
07 |
Herma Fotophan negative sleeves DIN A4 for 35mm (medium format) (from 11€) |
https://amzn.to/2MCna1x |
|
08 |
Transmitted light source, A4 Tracing Light Box (27€) |
https://amzn.to/34EvNP2 |
|
|
Alternative: A3 magnetic, dimmable light table (very bright) (50€) |
https://amzn.to/3gju1fs |
|
09 |
OBI plastic plate "Guttagliss Hobbycolor" Blue 50 cm x 25 cm x 3mm (5€) |
https://bit.ly/3yDUFp8 |
|
10 |
Negative holder: Lomography DigitaLIZA 135 Film Scanning Mask (35€) |
https://amzn.to/3Jol2TO |
|
11 |
Negative holder: Lomography DigitaLIZA 120 Film Scanning Mask (40€) |
https://amzn.to/3G2GUVw |
|
12 |
Tethering: Windows computer with calibrated monitor |
|
|
13 |
Tethering: suitable camera control software (here ControlMyNikon v5.6) (40€) |
http://bit.ly/3rk1EOO |
|
14 |
Tethering: suitable Tether Tools USB data cable (here Nikon D810) (60€) |
http://amzn.to/2Kzca47 |
|
15 |
Tethering: Tether Tools JerkStopper Computer (14€) |
https://amzn.to/3nLYJfz |
|
16 |
Tethering: Tether Tools JerkStopper camera (25€) |
https://amzn.to/38N0YJB |
|
17 |
Adobe Lightroom CC subscription (LR and PS) (12€/month) |
http://adobe.ly/3nMrLMn |
|
18 |
Negative Lab Pro Plugin for Lightroom (99USD) |
http://bit.ly/2JklcBC |
|
19 |
TESA Fabric Tape Gaffer Tape Black (L x W) 50m x 50mm (18€) |
https://amzn.to/3X1ERHA |
|
20 |
Giottos GTAA1900 Super Rocket-air Blower black (14€) |
https://amzn.to/3hscDVW |
|
21 |
Glacé cotton gloves 12 pairs oekotex light white size 9 (7€) |
https://amzn.to/3V8JWMz |
Kommentar schreiben